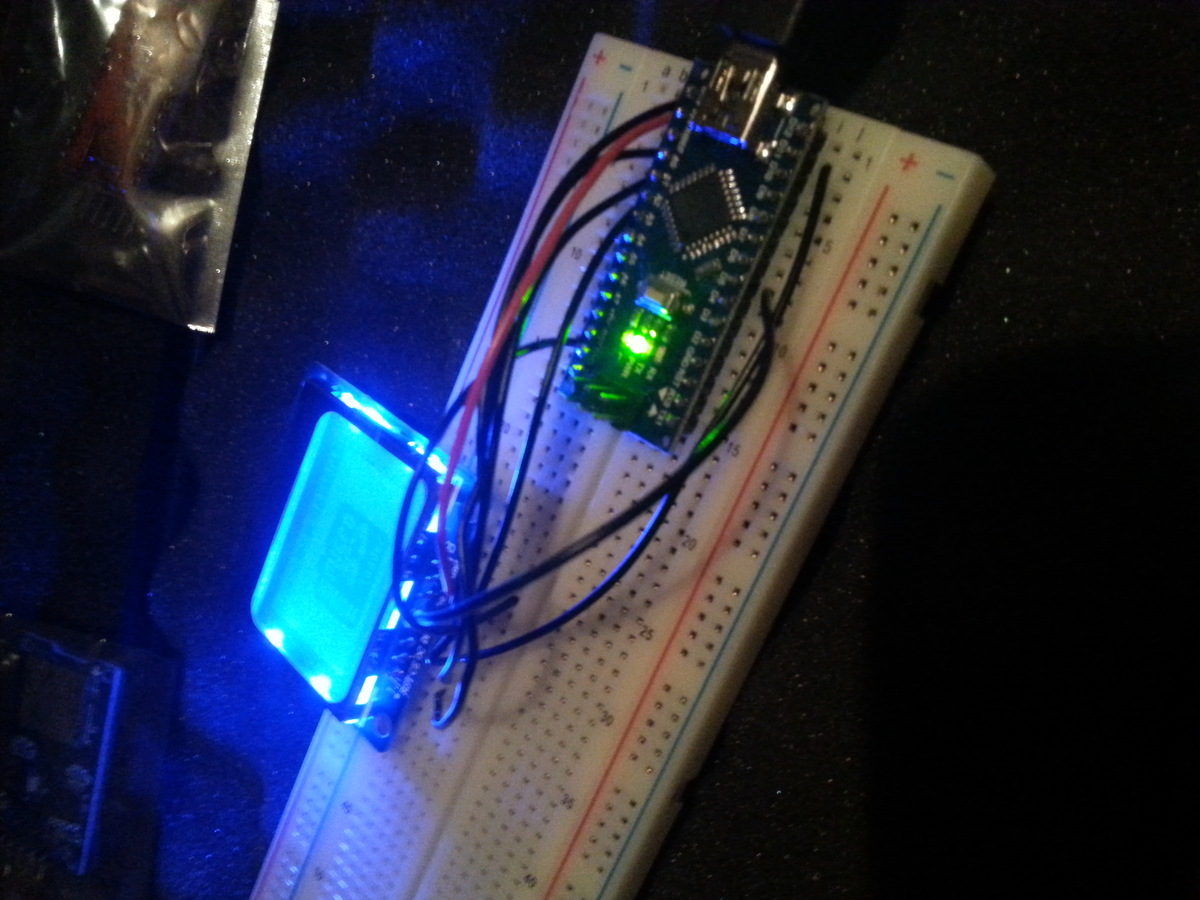
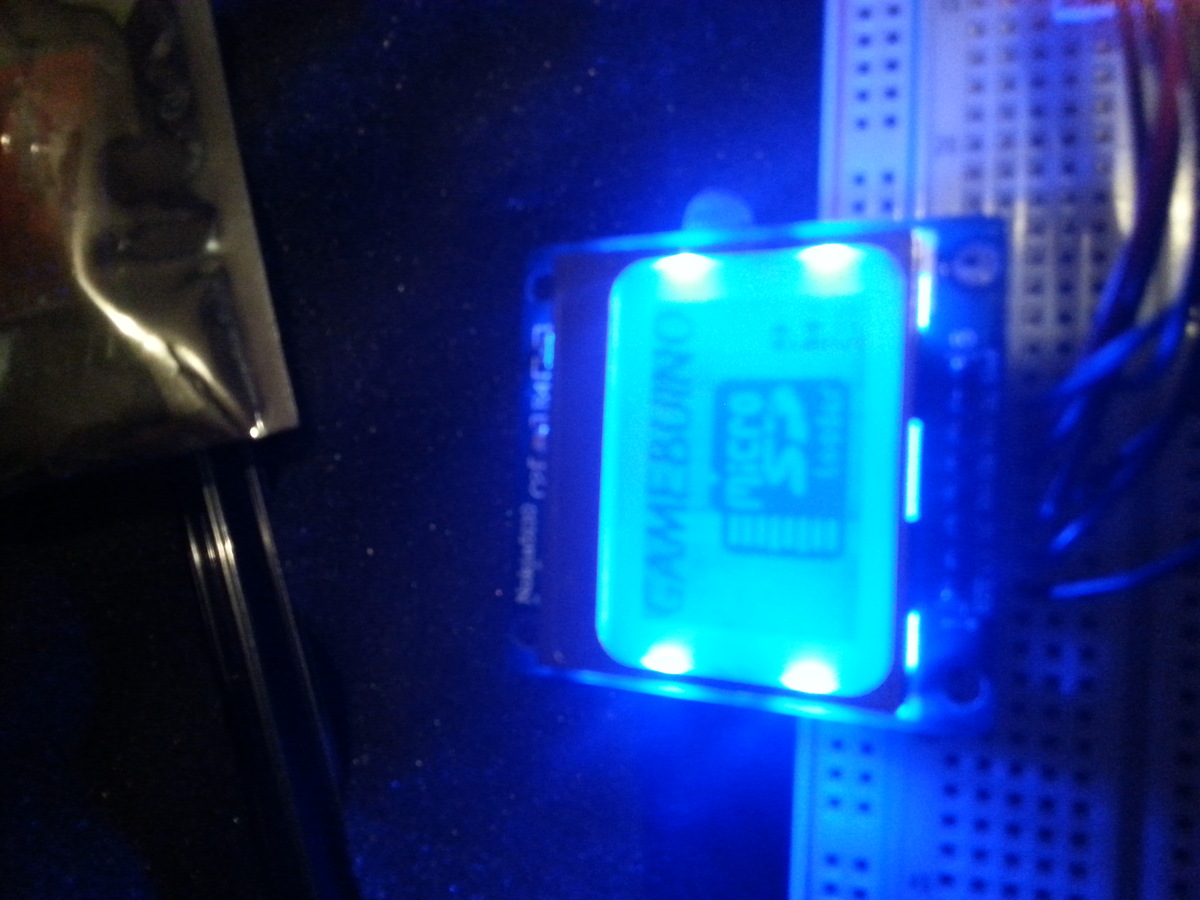
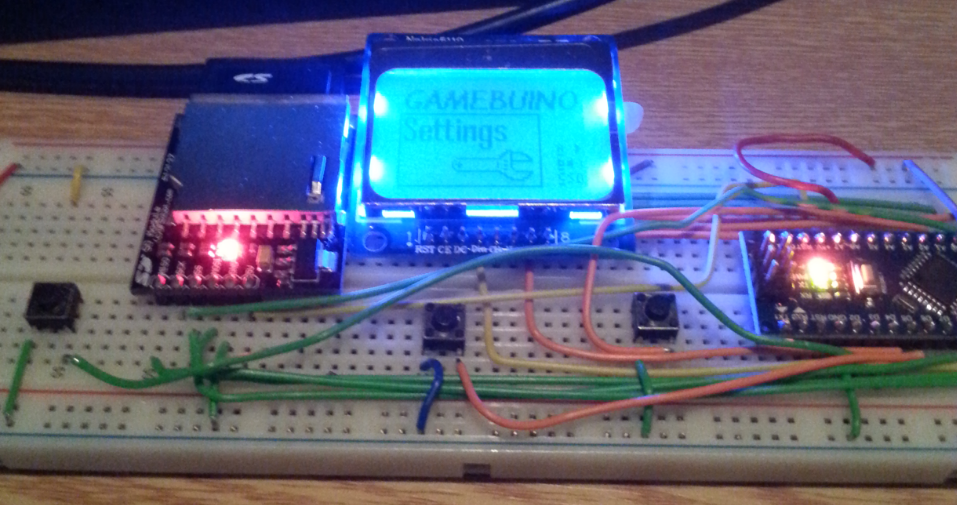
Based on the Gamebuino at www.gamebuino.com

My implentation using an arduino nano dev board

The boot loader has been flashed eith a modified version of optiboot.

Shall post further developments as I test the board

Next shall be the micro sd reader
Attached files:
-

20160218_002255.jpg
240 KB
Attached files:
-

20160218_002456.jpg
210 KB
Flashed the nano with information at

http://gamebuino.com/forum/viewtopic.php?f=12&t=932

Experimental boot loader available at

https://drive.google.com/file/d/0BweEjvtKj1KLMnMxNHFlSnZYN2s/edit?usp=sharing
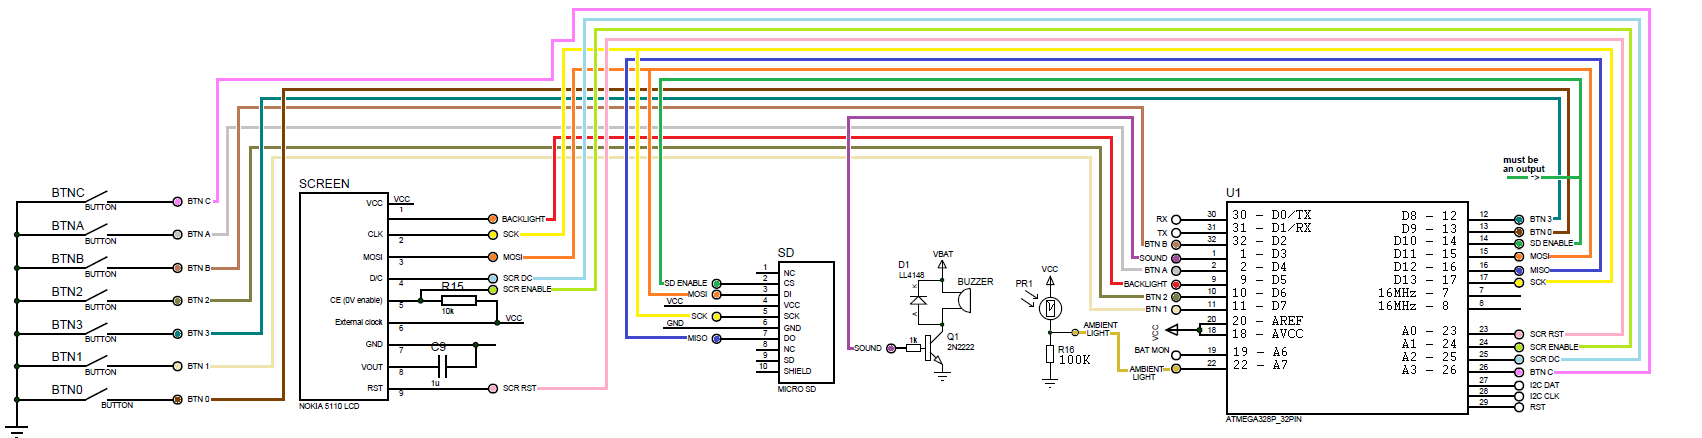
David R. wrote:
> At the moment my layout based on this schematic
I can see no (in numbers 0) decoupling capacitors at the ATmega...

You should NOT conntect Aref to Avcc. Instead you sould connect only a
capacitor from Aref to GND:
1 | Vcc --------| Avcc |
2 | | |
3 | .------| Aref |
4 | | | |
5 | 10n..100n === |
6 | | |
7 | --- |
Then you can also make use of the internal reference volatage. And of
course you can use Vcc as refeerence voltage also. Simply select it as
reference source in the ADC settings.
Lothar I'm only using the schematic as a guide, I dont have any
connection to aref at the moment.

But I'll bear it in mind for later
Attached files:
-

20160219_210949.jpg
240 KB -

20160219_210906.jpg
240 KB -

20160218_082050.jpg
230 KB

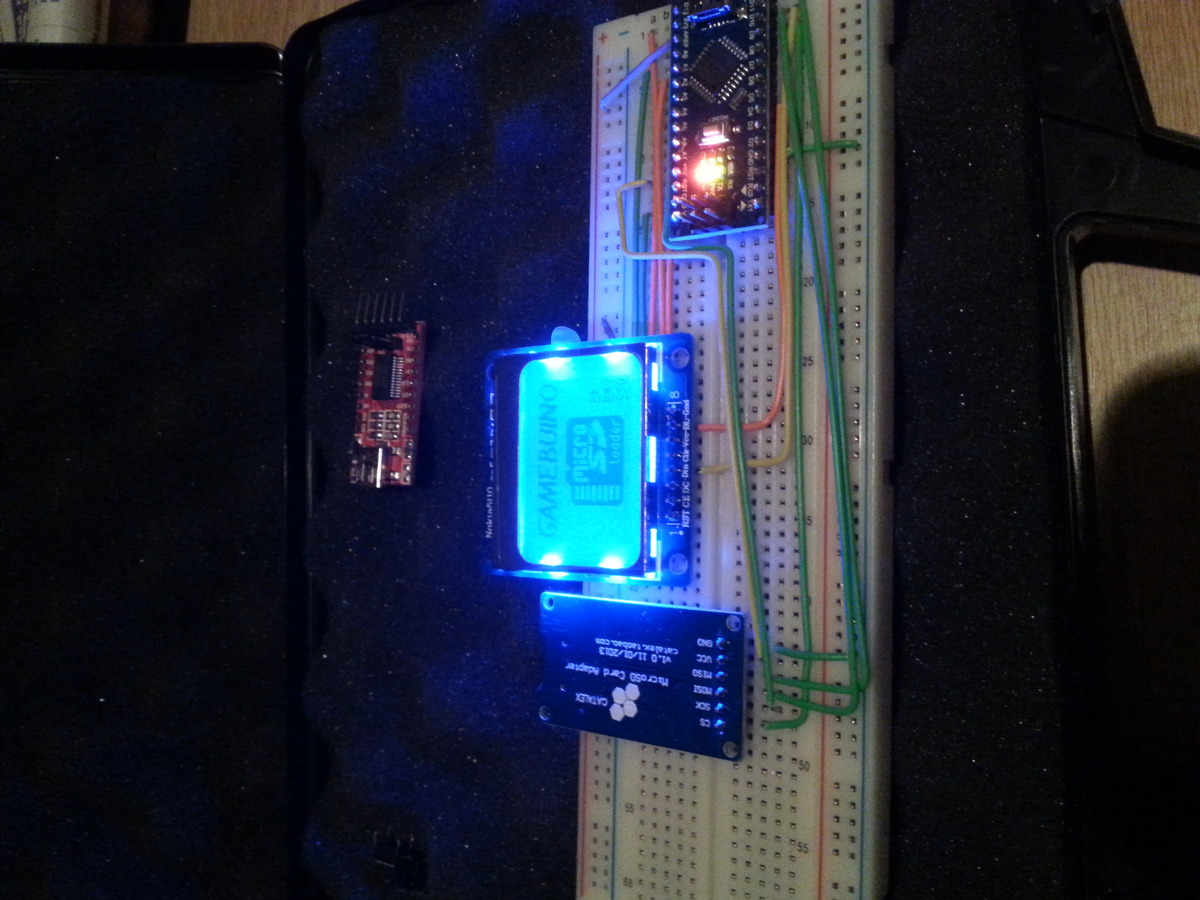

Ive now rewired the board, it looks alot better

The sd board is attached, formatted to fat 16, loader.hex and
settings.hex are present on the sd card.

With the sd card is inserted, the screen backlight has a slight pulsing
action, take it out and its steady! Both the screen and the sd module
connect to the same clock and mosi.

The sd card is running off 5v via its on board regulator and the screen
off 3.3v from the nano

Next for the buttons
Using the arduino ide and editing the board.txt file

Place this code at the end

gamebuino.name=Gamebuino Nano
gamebuino.upload.tool=avrdude
gamebuino.upload.protocol=arduino
gamebuino.bootloader.tool=avrdude
gamebuino.bootloader.unlock_bits=0x3F
gamebuino.bootloader.lock_bits=0x0F
gamebuino.upload.maximum_size=30720
gamebuino.upload.maximum_data_size=2048
gamebuino.upload.speed=57600
gamebuino.bootloader.low_fuses=0xFF
gamebuino.bootloader.high_fuses=0xDA
gamebuino.bootloader.extended_fuses=0x05
gamebuino.bootloader.file=gamebuino_boot/gamebuino_boot.hex
gamebuino.build.mcu=atmega328p
gamebuino.build.f_cpu=16000000L
gamebuino.build.board=AVR_NANO
gamebuino.build.core=arduino
gamebuino.build.variant=eightanaloginputs

Then using a usbasp programmer, connect the icsp header to the nano
board.

Then goto tools in the ide and select programmer as arduino asp or
usbasp, choose board as gamebuino nano then choose burn bootloader

Hey presto the bootloader is written and when the sd module is wired
pressing c on the clone the bootloader flashes the Gamebuino clone with
the loader.hex for choose what ever is on you sd card, game or settings.
Prior to doing the above

Download and extract to my documents on windows or the sketch folder if
on mac the 3 folders

When using the arduino ide, goto examples to see if gamebuino is there,
if so you have installed the routines for the Gamebuino clone

https://github.com/Rodot/Gamebuino/archive/master.zip
Attached files:
-

2016-02-23_19.45.35.png
680 KB
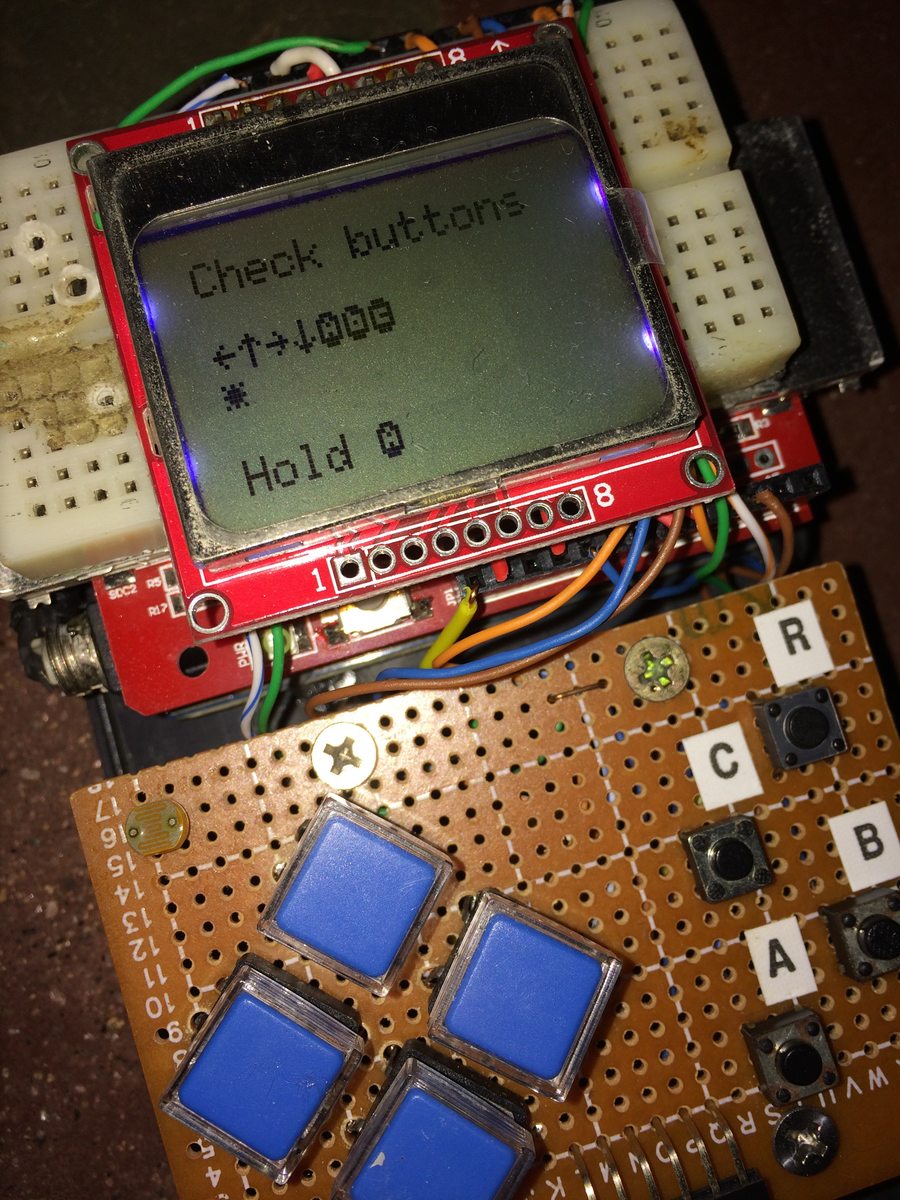
My new layout using single core hook up wire

The left button A , the middle button is down, the right button is C for
exiting games and accessing the SD

Next a nice pcb with probably just a atmega 328 instead of the nano
board
Pete K. wrote:
> What is your problemuino?

I have no problem, I am the author and  this is my post

If anyone else would like to build
In my homemade gamebuino,I have problem with sd card(2gb) ,when I insert
this card on gamebuino and it start pulsating screen, just like
continuously blinking screen, please help me.
Hi. You need a 100nf decoupling capacitor on the supply lines to the
lcd.
Attached files:
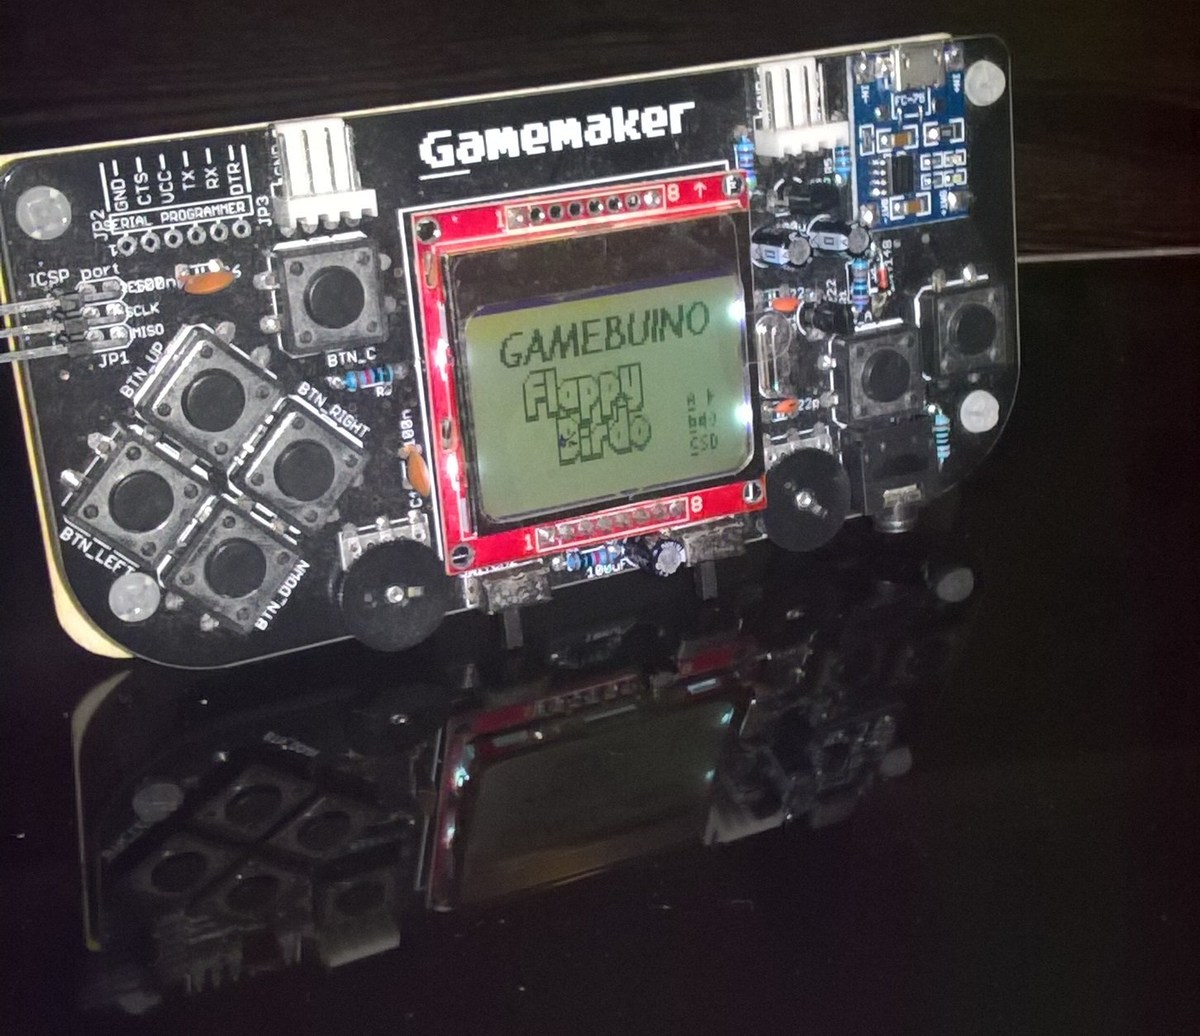
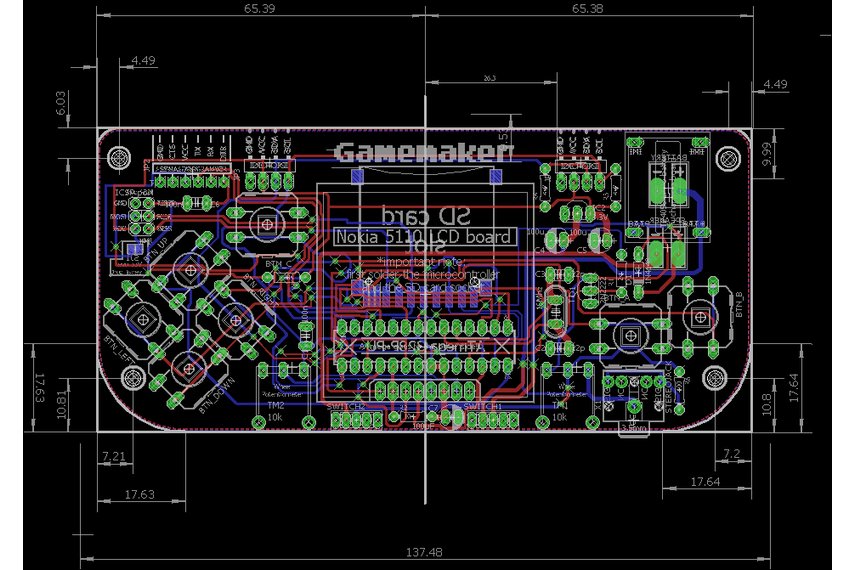
My latest design. Fully compatible with gamebuino and makerbuino.
David R. wrote:
> My new layout using single core hook up wire

There  is no layout, this is a mess! Get yourself a soldering iron if
you wish to become an engineer.
Bastler wrote:
> THT components ... really?!
> Groundplane?
Well, i don't see any sense in recreating something that already exists
except learning purpose.

But whats the problem with THT? It's easy to solder and absolutely OK
for home made projects like this.
And theres no need for a ground plane on "slow" mcu's like AVRs, but it
would be good for learning how to make perfect layouts.

mfg
Woz is in the air wrote:
> David R. wrote:
>> My new layout using single core hook up wire
>
> There  is no layout, this is a mess! Get yourself a soldering iron if
> you wish to become an engineer.

Why don't You all stop bitching. If you don't like it, don't comment
with shit criticism. This is a diy version of a smd board for noobs to
make.

See my website at www.makerbuino.com
I also made a diy gamebuino.
bootloader from rodot's file going to arduino uno.
same schematics.
but sd card doesn't flash after pressing C button.
LEFT button is pressed already, i removed the LEFT button wiring &
ground but at the SETTINGS, LEFT cursor is enable already.
I uploaded the LOADER.ino in the arduino uno & my sd card is read, still
my LEFT cursor is a problem.
Do I missing something?
Attached files:
-

IMG_3027.JPG
240 KB
I also made a diy gamebuino.
bootloader from rodot's file going to arduino uno.
same schematics.
but sd card doesn't flash after pressing C button.
LEFT button is pressed already, i removed the LEFT button wiring &
ground but at the SETTINGS, LEFT cursor is enable already.
I uploaded the LOADER.ino in the arduino uno & my sd card is read, still
my LEFT cursor is a problem.
Do I missing something?
Believe you need pin 4 if digital pin on arduino uno dev board for left
I'm only using the schematic as a guide, I dont have any
connection to aref at the moment.
Thank you for your great project !!!
Unfortunatly, the Drive link to the bootloader seems broken.
Could you give me a copy of it, please ?
Regards.
Please log in before posting. Registration is free and takes only a minute.
Existing account
Do you have a Google/GoogleMail account? No registration required!
Log in with Google account
Log in with Google account
No account? Register here.